It seems as if everything’s come full circle for me. If you remember, I started my local experiment due to a mind-blowing cherry tomato from John’s Farmer’s Market. Almost a year later, I find myself in John’s backyard helping him plant those very tomatoes. See, full circle.
Here’s how we did it, step by step.
Step 1 – Dig Holes.
(This is, of course after you’ve tilled your plot and made sure your soil is suitable for planting by checking pH levels, etc. Or just throw some gardening soil in a pot and dig your hole there.)
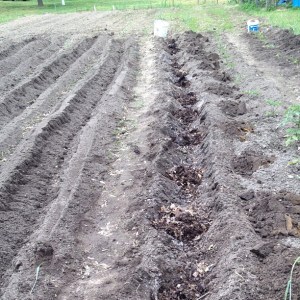
John dug the holes, about six to eight inches deep, sixteen per row and a little over a foot apart.
Step 2 – Add Food to the Soil.
As John dug, I followed behind him and dropped a few handfuls of garden tone and garden lime into each hole. John figures the lime will help with a common tomato problem: the dreaded Blossom End Rot, which happens when the tomato develops a sunken brown or black spot on its bottom and is inedible. BER (as it’s known in the gardening community) is the result of low calcium. John and I hope the lime adds calcium and prevents BER.
Step 3 – Mix the Food into the Soil.
Once the holes were dug and the extras added, John showed me how to incorporate the fertilizer and lime into the soil. Basically, the shovel acted as a big spoon and we mixed it all together.
Step 4 – Add Compost.
(Skip this step if you are not a fastidious compost maker like John. His compost is the result of months of kitchen scrap saving and hard work.)
Taking the wheelbarrow down the rows, we filled each hole with the rich, dark compost.
Step 5 – Separate the Tomato Plants.
(Skip this step if you have grown your own seedlings that don’t need separating. Obviously.)
John showed me how to separate the plants, being careful with the roots. John’s plants came from Lancaster County, PA. He got a bunch of them for only around $33.00! What a deal! This is what’s so exciting about gardening; the best tasting food for the absolute lowest price (if we don’t count the countless hours spent planting, weeding, harvesting and generally caring for each plant).
Step 6 – Plant the Plants!
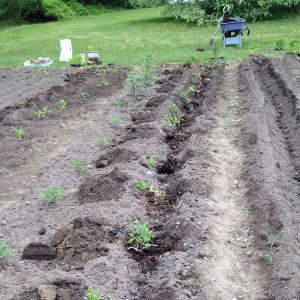
John and I placed a plant next to each hole. I started at one end and he started at the other. We dug into the compost and soil and gently placed the plant in its new home, lightly tamping down the soil around it to give the delicate plant a firm foundation.
Step 7 – Put the Soil Back.
I raked the dirt left over from John’s digging over the bottom of each plant, mounding it up a little to prevent a gust of wind from blowing it completely over. When doing this step, make sure each leaf is above the soil. Don’t bury any of those leaves!
Step 8 – Give the Plant Some Manure Tea.
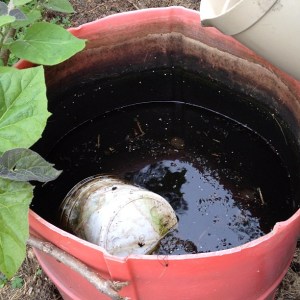
Yup, there’s such a thing as manure tea, and it’s not pretty. John makes it by placing horse manure in a large container of water. While it’s not an appealing item to have sitting in your back yard, manure tea is yet another way John gives nutrients to the soil. You know what else isn’t appealing? Having manure tea underneath your finger nails because you stuck your hand in it while filling up a water pitcher. It’s even less fun to spill it all over the sleeve of your sweatshirt.
Despite the lack of appeal, we doused each plant generously with manure tea.
And that’s it! Now we wait. Luckily, we had a generous amount of rain in Delaware last week. I was at John’s garden a couple days ago and the plants are flourishing! The broccoli, cabbage, cauliflower, and potatoes are tall and getting so leafy. The strawberries are starting to bear fruit! The rain also brought plenty of weeds with it, so I’ll learn the fine art of weed pulling from John next week.


Growing tomatoes is my favorite. I’m planting my 10-different-kinds this weekend. Hardening them off was rough though, so I hope planting them returns their health.
I’ll keep my fingers crossed for you! We planted a bunch of different kinds. I don’t know the specific names but grape and cherry were among them. Excited to see the fruits of my labor! 🙂
I bet you’re even more excited to EAT the fruits of your labor! Tomatoes are the best. 🙂
Pingback: What’s Good in the Garden this Summer? « Rachel's Table